If you have ever attempted the contour tool in Revit, you already know that it can be a headache. In this blog, I will hopefully shed some light on the subject for you. First, I realize that there are several ways to create a topo in Revit, but the way that I am showing you, I feel like is the fastest, most accurate way to create a complex site.
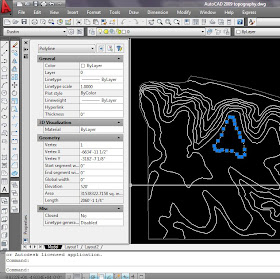
First, we will start in AutoCAD. You will need to create the contour lines for your site as poly-lines. The reason why you HAVE to have poly-lines is because poly-lines can be assigned an elevation within AutoCAD, thus making this a crucial step in creating a 3d site. In order to create a poly-line, you can type “pline” in the command line, or if you have a CAD file with existing contour lines that you would like to convert to poly-lines, you can use the “pedit” command, type “m” so you can select multiple lines, convert to poly-lines, select “join” option, and hit enter 3Xs.

Once you have created the poly lines that make up your contour map, you need to assign the appropriate elevations to each poly-line. In order to do this, select the poly-line you wish to edit, go to the line properties, and set the elevation to the desired height.
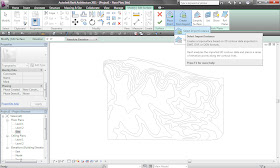
Once you have created your .dwg file in AutoCAD, it is time to import it into Revit. Now, within the Insert tab at the top of the screen, click “Import CAD” to import your .dwg file into the Revit project.
Now, to turn the .dwg into a toposurface. First, click the “Toposurface” button, in the site tab at the top of the screen. Next click “Create from Import” ”Select Import Instance” and then click on the .dwg that you imported.

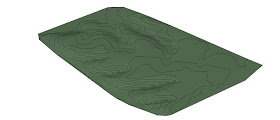
The previous step might take a minute or two, depending on the complexity of the site. Now click the check mark at the top of the screen and you toposurface is complete.

i am tring to create contours in autocad but so far i was unable to so can u tell me about how to use revit and why its better than QGIS plug-ins ??
ReplyDeleteAwesome! Thank you so much!
ReplyDelete