Sunday, November 21, 2010

Working in the Industry

By Dustin Stoll


Since the summer of 2003, I have spent my free time working at Graber Post Buildings in Southern Indiana. My uncle Glen Graber owns Graber Post and built the business from the ground up. He started out in 1973, constructing post frame buildings with his crew of three local Amish men. As the business began to grow, Glen saw the opportunity to expand his business into the wholesale and retail markets by purchasing truckloads of building materials to save on costs. In 1987 he purchased a roll-former in order to produce his own metal roofing and siding panels. After 37 years in the business, Graber Post is one of the leaders in the industry, and selling building materials across the entire continental United States, Canada, and Mexico.


When I began working at Graber Post, my jobs were mostly stationed in the manufacturing departments. I have helped roll thousands of miles of metal panels, bent countless pieces of trim, and helped assemble several wood trusses. Working in the building industry spurred my interest in architecture, and thus resulted in my enrollment in architecture school.

Since 2008 I have worked in the drafting department at Graber Post, where I use Revit Architecture to produce construction documents for some of the many buildings we build each year. It is a satisfying feeling to draw buildings that are actually being built, and it has helped me hone many of the skills needed for school.


Images provided by: www.graberpost.com

Tuesday, November 16, 2010

Spring Furniture Studio

By Ben Temperley


This week I am writing about my experience in Professor Wessel's Furniture Studio class. This is an elective that I found to be well worth the time. I took the class for graduate credit while enrolled as a Master's of Architecture student. Most students take the class for undergraduate credit. It is offered in the spring.

During the first four weeks of class we were asked to build a version of Gerrit Rietveld's "Berlin Chair". Rietveld designed the chair for an exhibition in Berlin in 1923. I would classify the chair design as De Stijl. De Stijl is Dutch for "The Style". It was a movement founded in the Netherlands and lasted from 1917 to 1931. De Stijl was characterized by simple rectangular forms and primary colors along with black and white. Piet Mondrian is a well known De Stijl painter. Our chair designs were to resemble the "Berlin Chair", but we could change the materiality, color, finish, decoration, jointure, and other qualities that we thought appropriate.


My version was made of 3/4" birch plywood. Birch plywood has a smooth finish, tight grain, and cuts cleanly. I could have used oak plywood, but oak is not as smooth and tends to chip when cut. I chose to give my chair a Japanese feel because I like the elegance of Japanese design. I wanted the chair to reflect my personality. I really like art and music, so I stenciled Kanji on the chair that translates as "artist" and "musician". Important to me is my faith in Jesus Christ. I represented this by inlaying three strips of wood that I stained deep red. The stripes are red for the blood Jesus shed. There are three to represent the Trinity. They also represent the stripes on Jesus' back from the scourging He received before being crucified. The Scriptures say "By His stripes we are healed." (Isaiah 53:5) I finished the chair with a clear coat of lacquer.


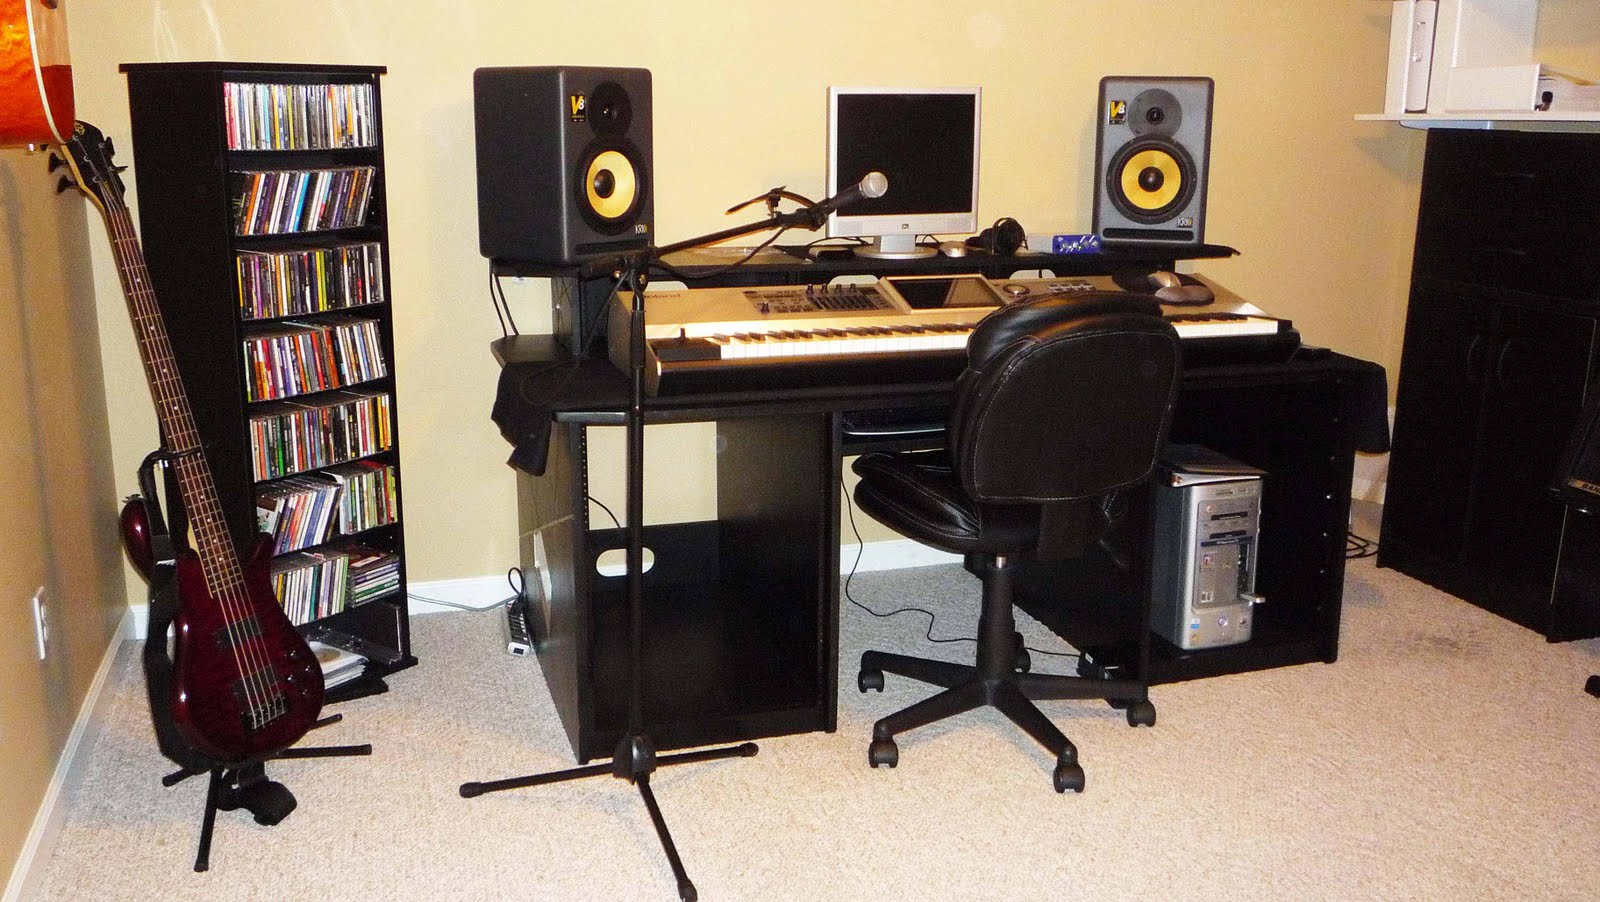
For the second project we were given the option to design whatever type of furniture we wanted. Students chose coffee tables, end tables, book shelves, etc. I chose to design a music workstation desk. This was my choice because my wife plays piano, and we wanted a place to set up recording equipment. The desk is about 6 feet long to hold an 88-key piano keyboard on one level. There is a second level above the keyboard to hold speakers and a computer monitor. There is ample storage space for various recording equipment. I chose a black and silver color scheme to match the music equipment we have like amps and a pedal board. I used the CNC machine in the blue barracks to cut out the design. That made my life much easier. For the jointure I chose metal dowels and cams.


The chair currently rests in my living room. It matches the color of the room quite well. The desk has been put to good use in my music room. My wife uses it about everyday. I really enjoyed the class, even though it required a lot of work. I am happy to be able to use the projects that I made. Finally, a piece of advice - if you choose paint as a finish, use spray paint if you do not want brush strokes on you project.

Monday, November 15, 2010

House: What it Means to People in Today’s World

By Bhakti Shah

In ancient times, basic needs of man were food, shelter and clothing. Over the period of time, man has developed due to globalization, industrialization and competition in various fields and his basic needs now have taken a larger scope. A house is one of such needs that have changed drastically.

A house has an emotional touch and it replicates the personality of the person living in it. It has an interior as per the requirements of the person living in it. Growing interest in the field of residential architecture and interior design has given a boost to housing design. People are now aware of the trends in house designing. From small cities to metropolitan areas, trend in decorating and designing the house of any scale is taking competitive form. Houses of different forms, materials and interior spaces are being preferred by the people. House is now not only a need but also a status of symbol in society. Creativity is now challenged because people are ready to spend large sums of money on their house. Interior Design and Landscape Design are the two additional fields on which people focus while designing a house. Old houses, bungalows and small apartments are also given ambitious makeovers.

The development in these creative fields is worth appreciation. It challenges the creativity, technology, knowledge and development in today’s globalized world.


Now a days, the awareness and implementation of sustainability concept is increasing. Individual houses are not behind in this race. I came to know about the world’s greenest and costliest house which was recently built in India. “Antilla” – It’s a house in the form of a 27 storied building with exceptionally high ceilings. With ideal ceiling height, it could have been a 60 storied structure. It occupies 35,000 sq.ft. of area with 500+ feet height. It is a private residence of an Indian billionaire industrialist and it is located in Mumbai, India where real estate costs as much as $1800/square foot. Mumbai is amongst the densest cities in the world, with almost 30,000 people per square kilometer. There has been some debate in India about spending a billion dollars to make an Individual home. It’s covered in foliage, with living walls enclosing all four sides, hanging gardens and green rooftop. The walls of plants will increase green space and combat urban heat island effect. But look behind the green façade, and as far as we can tell, there’s nothing else sustainable about the materials or construction. According to writer Sarah Rich, “Sustainability is most commonly defined as the ability to meet the needs of the present without compromising the ability of future generations to meet their own needs. Sustainability is about humanity as much as it is about greenery. Living walls are lovely, but they’re not a free ticket to environmental integrity. “

Ref : http://www.inhabitat.com/2007/10/25/sites-residence-antilia-green-tower-in-mumbai/

Rendering a Section View in Revit

By Dustin Stoll


If you have ever attempted to render a section in Revit, you will notice that there is no render option when you are in a section view. This option is not available, because section views in Revit are intended for drafting purposes only. Rendering is only available in 3d views, so in order to render a section we must figure out how to cut a section within a 3d view.

First, create a new 3d view for your project. Next, go to the view properties and click the “Section Box” check box. This will create a box around your entire project that you can manipulate to cut sections within the new 3d view that you created. Click the Section Box that you just created, to bring up directional arrows that you can move. This will give you the ability to cut through your building.

After you have created your desired section, simply follow standard Revit rendering procedures to render the view.

How to Plot in the SOA Computer Lab

By Scott Fisher

Step 1: Preferably bring all files to SOA Computer Lab in Quigley Hall, room 108, in pdf format.

Step 2: Open your file in the computer lab.

Step 3: Go to file print.

Step 4: Depending on what you are printing will result in what plotter to send it to. If you are printing b/w on 11 x 17 or smaller, print on CWPSArchitecturePublicQuene. If not, skip to step 6.

Step 5: Go to properties, Paper/Quality, Advanced, and then choose your paper size then click print.

Step 6: Type your dawgtag number in the dialog box that pops up and name your plot that you are sending.

Step 7: Go to the computer by the window and type your dawgtag number in, then swipe your ID.

Step 8: Click on the plot that you just named and click print.

Step 9: If you are printing color on 11 x 17 or smaller then print on \\soasr02\5500dn-1. If not, skip to step 11.

Step 10: Go to properties, Printing Shortcuts, and then choose your paper size then click print. (If you are plotting on glossy or 11x17 then notify the staff on duty so they can load proper paper).

Step 11: If you are printing b/w on premium trans-bond paper that is larger than 11 X 17, print on \\soasrv02\HP430-1. If not, skip to step 13 (this will print out on 36” roll only).

Step 12: Go to properties, paper size, and then choose your paper size and click print.

Step 13: If you are printing color that is larger than 11 X 17, then select a plotter from the chart below (this will print out on 36” roll only).

Step 14: Go to Properties (look at chart below to decide what settings to change).


Step 15: Go to Paper/Quality and select Advanced, select paper source: roll (see above chart), print quality: Best, Rotate: according to above chart.

Step 16: Click “Ok” three times to plot.

Step 17: Notify staff on duty that a plot was sent.

Step 18: Wait for your plot to print out and then give your ID to the staff for your payment of your plot.

Notes:

-If a file is bigger than 30 MB, give the file to the staff on duty to be plotted on HP Designjet 4520ps PS3-1 on soasr02.

-If you want to plot larger than 11 x 17 on glossy paper, then give your file to the staff on duty to be plotted on HP Designjet 4520ps PS3-1 on soasr02.

-Files can be plotted in other formats, but PDF format will send faster, therefore it will plot much faster.


Image: http://demo.livecart.com/id/HP-DESIGNJET-1055CM-PLUS.6167

Friday, November 12, 2010

Halloween Project – Freshman

By Yuko Aoki

When you decide to study architecture at Southern Illinois University for a Bachelor’s Degree, you might get a seasonal project. Over the recent couple of years, students have had to be creative for Halloween. The pumpkins on the steps, at the south entrance of Quigley Hall, were carved by freshman students in architecture and were exhibited for a few days. They were asked to make architectural Jack O Lanterns!!


Some of them are landmark buildings and some of them are famous architects’ faces. The trend of this year seems to be carving silhouettes of landmark buildings like the Statue of Liberty, the Eiffel Tower, and the skyscrapers of New York City. Proportions of buildings are critical to show what the buildings are. Each pumpkin has a candle in it, but were not lit when I took these pictures. I am wondering how they will light up in the night.

I did not do this project when I was in my freshman year, but I would like to make one for Halloween next year. It is nice to have a fun, quick, and easy projects between actual studio projects. They also can be very unique.

Thursday, November 11, 2010

A Sense of Place

By Tara D. Loughman


Designing a space, whether for interior or exterior use, the space can hold a variety of implications, and for various purposes. In outdoor spaces, design can be defined as a process of specific planning for various and distinctive features that are used to create a valuable strategy for landscapes and urban design. In architecture, designing can be defined in a very similar way except we possess additional focus towards the actual structure and space within the envelope we are creating. In addition, architects use the exterior more for structural form and aesthetic appeal.


Place can be defined as a particular portion of space, whether of definite or indefinite extent (dictionary.com). A place is also somewhere where you as the viewer should feel comfortable and at ease. Places are everywhere; you’re home, the office, the mall, etc. Some people have a certain place where they go to meditate or to read quietly. Wherever the place is for you, it usually is designed for a particular purpose and or function.

A sense of place, to me, is specific to one’s own viewpoint. The site must take in account of the relationship between its region and whereabouts. In outdoor spaces, a sense of place should be formed according to its atmosphere. Along with that, a distinct relationship should be made to the sites architecture, history, culture, and anything else noted that would offer a distinct persona.


As designers we create key moods. This can be intentionally or not, but these moods give the viewer a sense of feeling and reaction toward the atmosphere we are shaping. The feeling you can receive from a sense of place provides the impression of connectivity and meaning. The disposition for the place can be very different, ranging from humorous and cheerful to a distinct sadness. Whatever the emotion expresses, it should engage in a positive outlook for the design and the site.

Overall, creating a sense of place can make for an amazing interest towards a site. Know matter how one person perceives the space is for individual debate. As long as the outdoor space can capture one’s imagination on any positive level, a sense of place has been created.

Sources:
Dictionary. (10/13/10) Citation. http://dictionary.reference.com/browse/place