By: Stephen
Lauer
Post 4: Adding People in
Photoshop
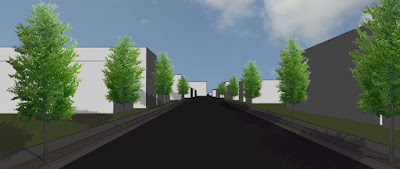 Sorry for missing a week on the
tutorials but I will continue working from where we left off 3 weeks ago with
the rendering. This post will be all about adding people into renderings in Photoshop.
The image to the right is where we left off last time and where we will begin
now. First step is to decide what people will be used throughout the image. Just
to reiterate from last time there are many of websites out there that have
textures, trees, people, etc. that are free to download from. A few examples of
these would be mrcutout.com or cgtextures.com. The best thing to do from
these sites is to build up a library of images that can be used for future
projects.
Sorry for missing a week on the
tutorials but I will continue working from where we left off 3 weeks ago with
the rendering. This post will be all about adding people into renderings in Photoshop.
The image to the right is where we left off last time and where we will begin
now. First step is to decide what people will be used throughout the image. Just
to reiterate from last time there are many of websites out there that have
textures, trees, people, etc. that are free to download from. A few examples of
these would be mrcutout.com or cgtextures.com. The best thing to do from
these sites is to build up a library of images that can be used for future
projects. 
In this render I want to have people walking down the sidewalk to add
some life. When adding people, do not place the same person over and over
because no 2 people are alike and doing this will cause the image to be less
realistic. To begin add a person to the image and scale the image down to a
correct scale. Depending on the perspective of the person added, a little
transforming may need to happen to make it so that the image fits into the
rendering. The image to the right shows how I have begun to add people in and
used the technique learned last time with adding shadows on trees to add
shadows for the people (I have turned the tree layers off to show the people).
I have also added a guide across the entire image to be a height guide for
scaling each person. By keeping each person around this guideline will allow
for the image to stay in perspective. After this the process is just repetitive
in adding more people and shadows. To do a person that is running or riding a
bike and make it so that they look as if they are moving a blur can be added to
accomplish this. For this I would use the motion blur filter and set it to an
angle that matches the perspective of the image. The amount of blur that is
needed depends on how fast they could be moving. In my opinion I would not use
too much blur because this can distract from the overall image.

To finish the
movement place a copy of the still image in front of the blur to make it look
like the still person is moving. Here is my render up until this point. I added
a few more trees and adjusted the vibrance and saturation to brighten the image
a little bit.


No comments:
Post a Comment