For those of us who have been using Autodesk products for awhile, we have noticed a major change in user interface within the past two or three years. It seems as if Autodesk has taken a page from Microsoft’s book, by utilizing a ribbon at the top of the screen instead of the standard icons we have grown so fond of. Like it or not, ribbons are here to stay and below are a few tips on dealing with them.

With Auto CAD, it is easy to switch back to a more familiar “classic” view, if one is totally opposed to conforming to the new interface. In the lower right hand corner of the screen, below the command window, there is a “gear” shaped icon that allows for transition between types of work spaces.
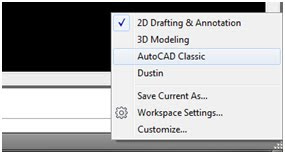
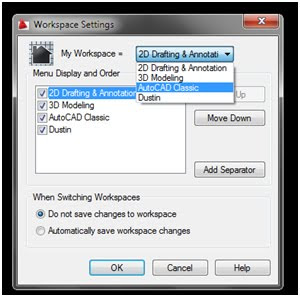
Switching to the classic view can also be achieved by simply typing “workspace” into the command line, and selecting “settings” from the available options. Within the settings window, it is easy to select classic view from the “my workspace” drop-down menu.
Revit doesn’t give us a choice when it comes to using the new ribbon interface. There is no option to switch to a “classic” view in Revit. However, there is a way to put all of your most frequently used icons in a place where they can be accessed without using the ribbon. This useful option is hiding right under your nose and can be a major time saver. If you look at the very top of the screen, you will see the “open” and “save” icons. These icons are docked on something called the “Quick Access Toolbar” (QAT). Many people know that this toolbar exists, but don’t know that any of Revit’s many icons can be added to it.

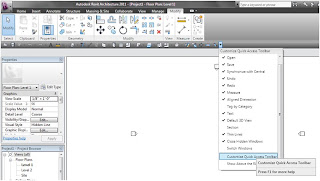
The first thing that I like to do when I set up a QAT, is to move it below the ribbon. This can be achieved by clicking the “down arrow” at the far right of the QAT. This allows much more room for adding icons. To add an icon to the QAT, right-click on the desired icon and click “Add to QAT.”
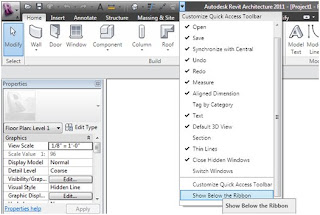
Once you have added your icons to the QAT, you can easily manage them by clicked the QAT drop-down menu and selecting the “customize” option. Here, you can move and delete icons as desired.
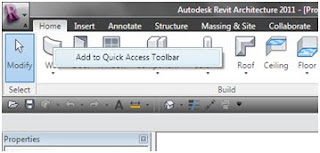
The QAT is available on all ribbon based interfaces and can be a very useful tool. I hope that you can use this toolbar to become more productive and efficient in your work.


No comments:
Post a Comment